Getting Started
This guide walks you through your first session with SyncUp.
Prerequisites
Section titled “Prerequisites”- SyncUp is installed on your site.
- You are a member of a Jira Scrum project with an active sprint.
1. Open SyncUp
Section titled “1. Open SyncUp”Open any Jira Scrum project, then in the left-hand navigation choose Apps → SyncUp. The first load reads the active sprint and renders the dashboard.
If you don’t see an active sprint, you’ll get a friendly info message - start a sprint from your project’s backlog and reload.
2. Skim the top bar
Section titled “2. Skim the top bar”The header at the top of SyncUp is always visible across every tab:
- Health Score (0-100) with a Healthy / At Risk / Critical badge
- Completion percentage and items count
- Blocked items count
- Time Used percentage and days remaining
- The active sprint name, day counter, and the realistic forecast badge
- A ↻ Refresh button
3. Set team roles (admin, one-time)
Section titled “3. Set team roles (admin, one-time)”SyncUp tailors the Daily Brief by role. By default, every user is treated as a Developer. A project admin should assign Scrum Masters and Product Owners.
- Open the Settings tab.
- Click 👥 Team Roles in the left sidebar (only visible to project admins).
- For each team member, pick Developer, Scrum Master, or Product Owner.
- Click Save Roles.
Non-admins see their own role under 👤 Your Role but cannot change it.
4. Read your Daily Brief
Section titled “4. Read your Daily Brief”Switch to the Daily Brief tab. What you see depends on your role:
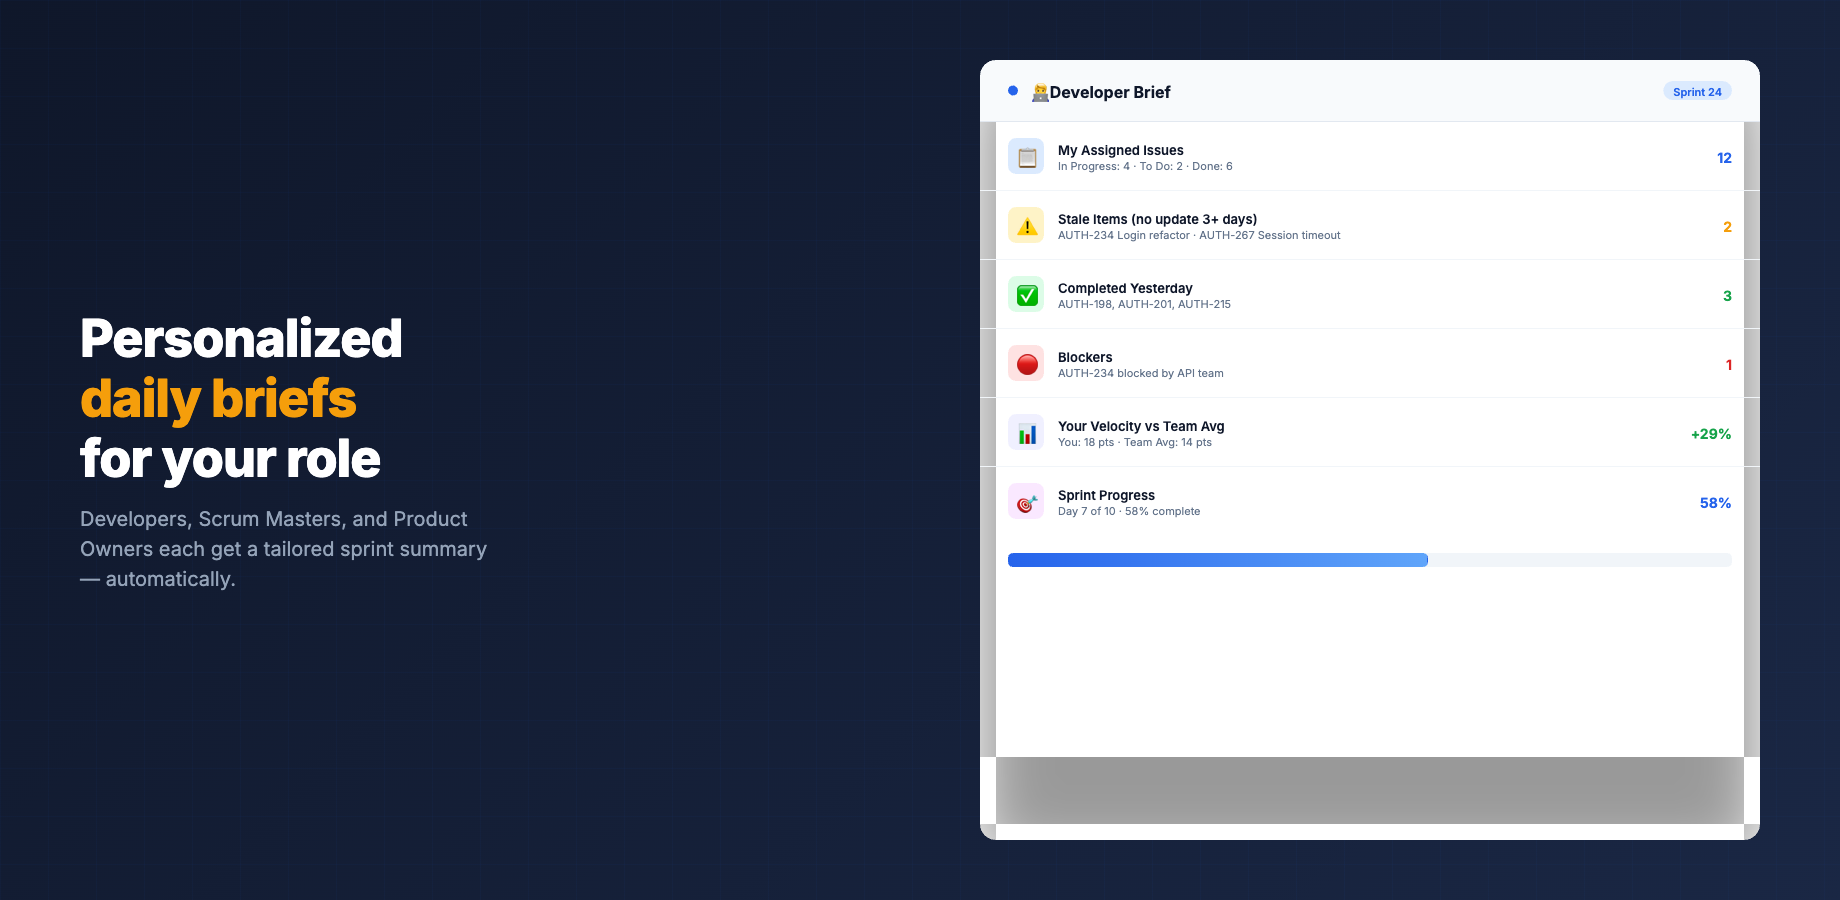
- Developer: Urgent items, Your Focus Today, Waiting for You, Recently Completed, weekly stats
- Scrum Master: Sprint health + breakdown, forecast, blockers, suggestions, team balance
- Product Owner: Sprint goal + confidence, delivery status, due-date alerts, decisions needed, velocity trend
Every issue row is a direct link into Jira.
5. Check Sprint Health
Section titled “5. Check Sprint Health”The Sprint Health tab shows the same health score in detail:
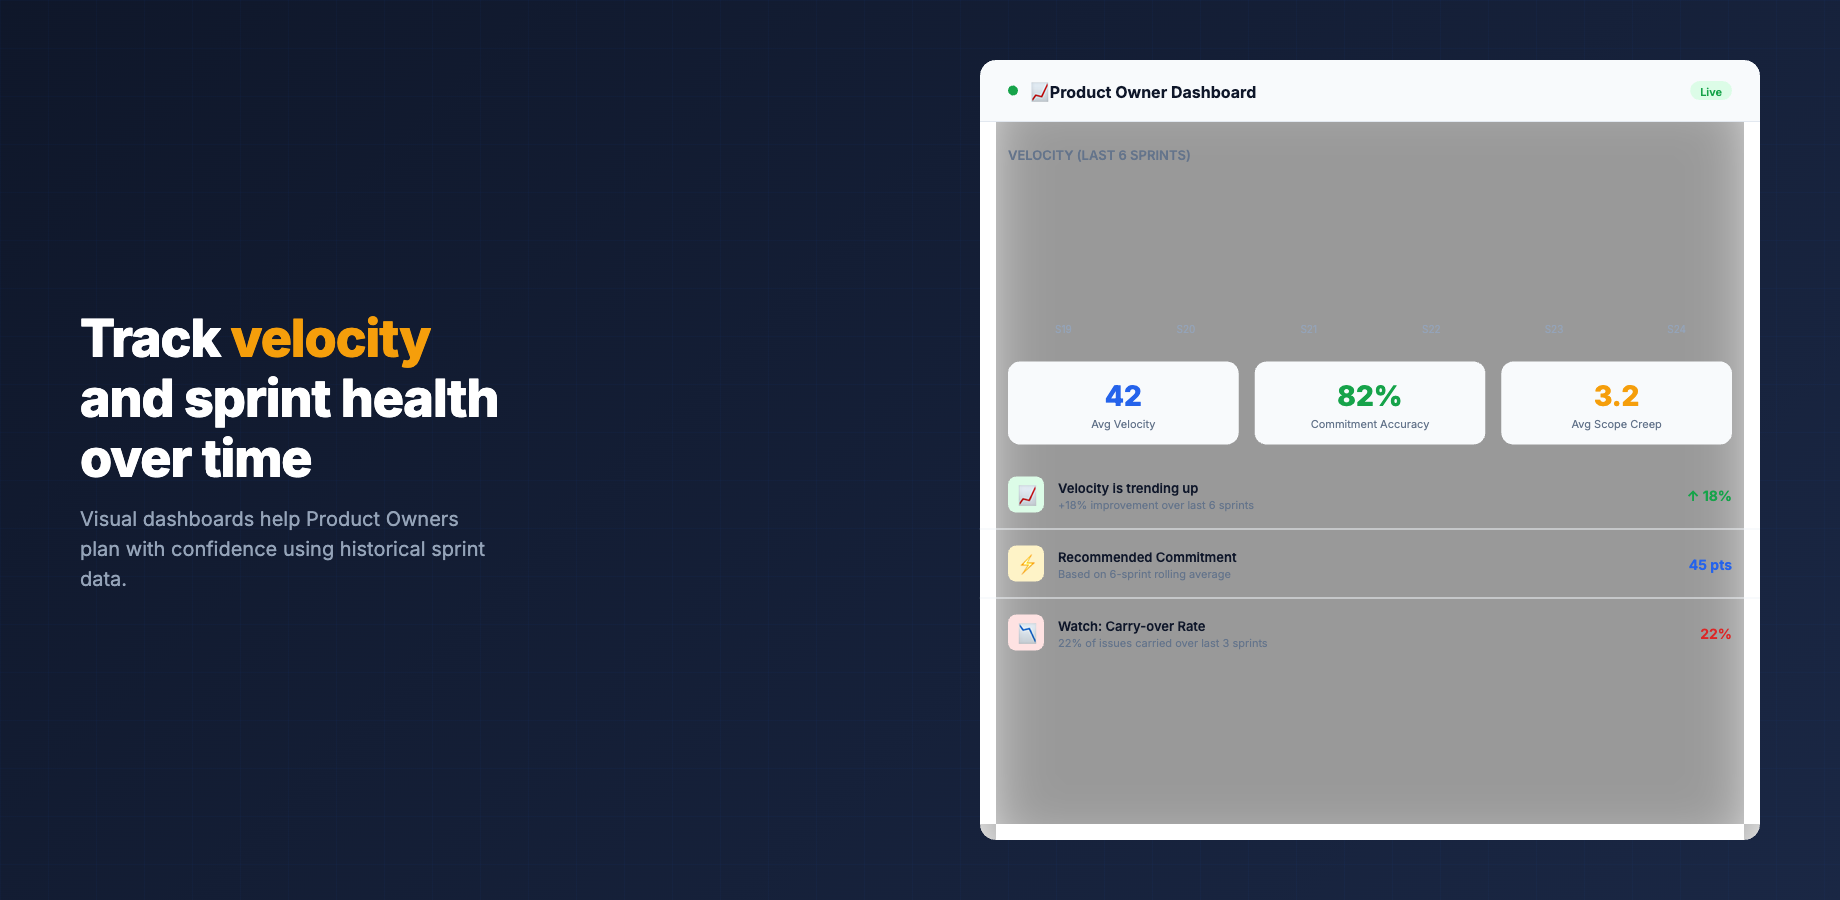
- The Sprint Health score broken into 5 weighted components (Progress vs Time, Blocked Items, Scope Stability, Team Balance, Velocity Trend)
- Delivery Scenarios: optimistic, realistic, and pessimistic projections plus the current daily velocity (items/day)
- Team workload distribution
6. (Admin) Turn on daily email briefings
Section titled “6. (Admin) Turn on daily email briefings”If you want SyncUp to email your team a digest before standup:
- Open Settings → 🔔 Notifications (admin only).
- Toggle Daily Briefing on.
- Pick a Standup Hour (7:00-14:00) and Timezone.
- Toggle Jira Email Notifications on (the delivery channel - uses the anchor issue described in Install).
- Click Save Notification Settings.
Use 📧 Send Daily Brief to send a one-off test, and 🏁 Sprint Report to send the latest closed-sprint autopsy on demand.
- Explore the Daily Brief in depth
- See an automatic Sprint Report when a sprint closes
- Tune your personal preferences (alert sensitivity)
Stuck? See Troubleshooting & FAQ.